13/01/2024 • 5 Minute Read
Import your CSV data into a Neo4j Graph Database
Efficiently Import Your CSV Data into a Neo4j Graph Database With This Comprehensive Guide
Databases
Graphs
Neo4j
Tutorial
The Neo4j Admin Bulk Import tool enables you to import your CSV(s) into a Neo4j database. It works by separating nodes and edges into different tables, as well as annotating the fields of CSVs so they can be correctly interpreted by the importer.
This tutorial will cover the following:
- How to strategically split your dataset into multiple CSVs
- How to correctly annotate the fields of your CSVs
- How to use the Bulk Import tool
- Viewing the example dataset used in this tutorial
How to Strategically Split Your Dataset into Multiple CSVs
There are multiple approaches you could take to importing your dataset into Neo4j. However, I would recommend splitting your dataset into nodes and edges, as well as by node type and edge type. For example, a supply chain graph may be split in the following way:
- Nodes
- Products.csv
- Companies.csv
- Carriers.csv
- Customer.csv
- Edges
- Delivers.csv (carriers → products)
- Provides.csv (companies → carriers)
- Receives.csv (customer → products)
How to Correctly Annotate the Fields of Your CSVs
Now that you have split up your dataset, you should add the Neo4j annotations to the fields of your CSV tables. This is not only required for importing certain elements (like edges) but also provides some niceties such as ensuring Neo4j interprets your fields as the correct type (throwing an error if it cannot) as well as ensuring you are setting up the correct relations.
I have created an example dataset which covers most of what you will need to know about these annotations:
https://github.com/LGXprod/Fake-Social-Media-Dataset
Node Datasets
Person Dataset
Header fields of people.csv:
personId:ID(Person-ID),first_name,last_name,birth_date:date,age:int,location,genre,bot_score:float,:LABELEvery person node in our dataset has a value for each of the fields above.
Each person can be uniquely identified by the personId field. The :ID annotation allows the importer to know this field is intended as an id field and the (Person-ID) annotation is the id namespace. The id namespace is not required but highly recommended when creating an id field as it allows you to enforce only specified relations (edges). This will be covered more in the edge datasets section.
String fields such as first_name and last_name do not require a data type annotation as string is the default if Neo4j can’t infer your data type.
For non-string types such as date, int and float the data type annotation isn’t required but recommended to ensure the type is inferred correctly. This can be seen with fields such as birth_date, age and bot_score.
The final field in the header is a special field called :LABEL. This field defines your “node type”, so because we are only creating people nodes in the people.csv this whole field will contain the same value: person.
Poster Dataset
Header fields of posters.csv:
posterId:ID(Poster-ID),username,age:int,genres:string[],:LABELEvery “poster” on this social media platform has there unique set of properties to the regular people. The same syntax and recommendations for the people nodes follow here, however there is one additional data type and that is the list. This can be seen on the genres:string[] field where the genres property can contain multiple string values because of the [] syntax.
Edge Datasets
Follows
Header fields of follows.csv:
personId:START_ID(Person-ID),personId:END_ID(Person-ID),:TYPEAn edge in a graph is simply a connection from one node to another (node)-(node). Neo4j treats all edges as directed edges meaning the start node points to the end node: (start node) → (end node).
As such, instead of using the :ID annotation like in the node tables, we need to use the :START_ID and :END_ID annotations. Moreover, like with the node ids, we can add an ID name space. This ensures we don’t accidentally create a connection between node types we didn’t intend to. For example in the following code snippet I made an error by adding the id of a poster 32b71e1c-15ca-4a24-9005-8162a3bd2154 to the person end ID, which is supposed to be a person:
personId:START_ID(Person-ID),personId:END_ID(Person-ID),:TYPE
4c419279-d0d6-4290-9563-b42db18dbe9b,aa147d2e-dae2-4818-a250-ce29120b300e,follows
4c419279-d0d6-4290-9563-b42db18dbe9b,32b71e1c-15ca-4a24-9005-8162a3bd2154,follows
If we did not include the (Person-ID) ID namespace then the bulk importer would import this faulty relationship. However, with the ID namespace the bulk importer will produce an error and stop the import so that we can fix the data.
The :TYPE field is essentially the equivalent of the :LABEL field for edges. In that it defines the “type” of the edge. As can be seen with the previous code snippet each value of :TYPE will be the same.
Subscribes
Header fields of subscribes.csv:
personId:START_ID(Person-ID),posterId:END_ID(Poster-ID),:TYPEThe subscribes dataset follows the same conventions discussed in the previous section. However, it does should how nodes of different types (in this case people and poster) can have edges between them as well.
How to use the Bulk Import tool
Now that we have our data ready to be imported, we need to copy it into the import directory of our Neo4j database. If you followed my tutorial on setting up a Neo4j database with Docker Compose this will be in ./neo4j_db/import (assuming your shell is in the directory in which you created the docker compose file).
After you have copied the dataset directory provided earlier in this article into the import directory of your neo4j database, start your neo4j container by running:
docker compose up -dThen enter the shell of the neo4j container by entering:
docker exec -it <neo4j-docker-container-name> /bin/bashWhere <neo4j-docker-container-name> is the name of your Neo4j container (in my aforementioned tutorial the container name is neo4j).
Once you are inside the Neo4j shell you can enter the following command to start importing the data:
neo4j-admin database import full --overwrite-destination \
--nodes=import/dataset/nodes/people.csv \
--nodes=import/dataset/nodes/posters.csv \
--relationships=import/dataset/edges/follows.csv \
--relationships=import/dataset/edges/subscribes.csv \
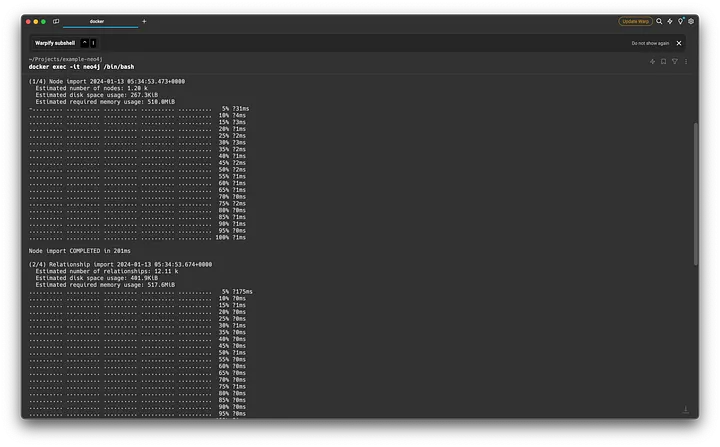
neo4jThe data loading interface should appear like this:
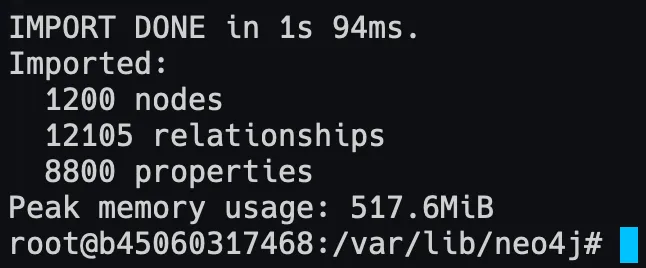
And once the import processes are complete it should show you this:
The restart the Neo4j container by running:
docker compose downFollowed by:
docker compose up -dTo view the imported data in your database.
Viewing the Example Dataset used in this Tutorial
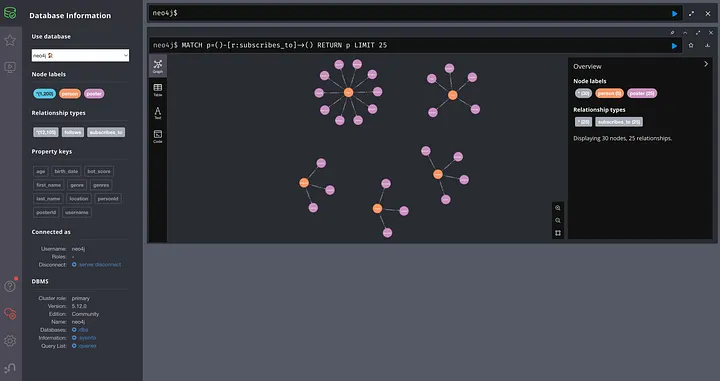
You can now view the data in this graph by going into the Neo4j browser and using the buttons in the left panel or writing your own Cypher query.
If you would like to learn about how you can write advanced queries and create advanced visualisations in Neo4j, please follow me as I will be posting an article on this topic in the near future.
References
Neo4j-admin import - Operations Manual
Property, structural, and constructed values - Cypher Manual